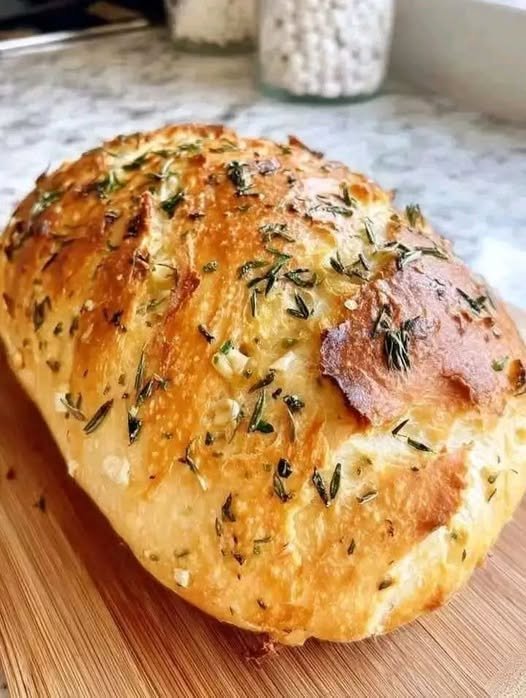
Making soft, fluffy gluten-free bread at home can be surprisingly easy when you use the right combination of ingredients and techniques. Unlike traditional wheat bread, gluten-free dough does not develop stretchy gluten, so the dough will look more like a thick, sticky batter than a smooth ball. That is completely normal. The combination of gluten-free flour, tapioca starch, eggs, yeast, and a little oil creates a tender loaf with a light texture and a soft crumb.
This homemade gluten-free bread is perfect for sandwiches, toast, breakfast, or simply spreading with butter and jam. It has a mild flavor and a texture that is much closer to regular sandwich bread than many dense gluten-free loaves.
Ingredients
Dry Ingredients
- 2 cups (280 g) gluten-free all-purpose flour blend
- 1 cup (140 g) tapioca starch or tapioca flour
- 2 tablespoons (25 g) granulated sugar
- 1½ teaspoons salt
- 2¼ teaspoons (7 g) instant or active-dry yeast
Wet Ingredients
- 1¼ cups (300 ml) warm milk
- 2 large eggs, preferably at room temperature
- 3 tablespoons (45 ml) neutral vegetable oil or melted butter
- 1 tablespoon apple cider vinegar
- 1 teaspoon honey, optional
If your gluten-free flour blend does not already contain xanthan gum, add approximately 1½ teaspoons xanthan gum. Xanthan gum helps provide structure and prevents the finished bread from becoming crumbly.
Equipment
- 9 × 5-inch (23 × 13 cm) loaf pan
- Large mixing bowl
- Electric mixer or stand mixer
- Rubber spatula
- Measuring cups and spoons
- Wire cooling rack
- Serrated bread knife
Instructions
1. Prepare the Loaf Pan
Lightly grease a 9 × 5-inch loaf pan with butter or oil. You can also line the bottom with parchment paper to make removing the bread easier.
Set the prepared pan aside while you make the dough.
2. Prepare the Yeast
If you are using active-dry yeast, place the warm milk in a small bowl. The milk should feel warm but not hot, ideally around 105–110°F (40–43°C).
Add the sugar and yeast and gently stir. Let the mixture sit for approximately 5–10 minutes. The surface should become slightly foamy, which indicates that the yeast is active.
If you are using instant yeast, you can skip this step and add the yeast directly to the dry ingredients.
Do not use very hot milk because excessive heat can kill the yeast and prevent the bread from rising.
3. Combine the Dry Ingredients
In a large mixing bowl, whisk together the gluten-free flour blend, tapioca starch, salt, and xanthan gum if your flour blend does not already contain it.
Mix thoroughly so that the ingredients are evenly distributed. This is particularly important for xanthan gum because you want it spread throughout the flour rather than concentrated in one area.
4. Add the Wet Ingredients
Add the eggs, oil or melted butter, apple cider vinegar, honey, and warm milk mixture to the dry ingredients.
Using an electric mixer fitted with a paddle attachment, beat the mixture on medium speed for approximately 3–4 minutes.
The mixture should become smooth, thick, and sticky.
Unlike traditional wheat bread dough, gluten-free bread dough should not be kneaded by hand. There is no gluten network to develop, and adding extra flour to make the dough easier to handle can result in a heavy loaf.
The correct consistency is similar to a very thick cake batter.
5. Transfer the Dough to the Pan
Scrape the dough into your prepared loaf pan.
Dip a rubber spatula or your fingers in a little water and gently smooth the surface. Gluten-free dough can be sticky, so using wet hands or a damp spatula makes this step much easier.
Try to distribute the dough evenly from one end of the pan to the other.
6. Let the Bread Rise
Cover the pan loosely with plastic wrap or a clean kitchen towel.
Place it in a warm, draft-free location and allow it to rise for approximately 35–60 minutes.
The exact rising time depends on the temperature of your kitchen and the activity of your yeast. The dough should become visibly puffy and should rise close to the top of the loaf pan.
Do not allow the dough to rise dramatically above the pan. Gluten-free bread can overproof more easily than conventional bread, and an overproofed loaf may collapse during baking.
7. Preheat the Oven
While the bread is rising, preheat your oven to 375°F (190°C).
Make sure the oven is fully heated before putting the bread inside. A properly preheated oven gives the yeast bread an immediate burst of heat, helping it set properly and maintain its shape.
8. Bake the Bread
Place the risen loaf in the center of the preheated oven.
Bake for approximately 40–50 minutes.
The bread should develop a golden-brown crust and feel firm when gently tapped.
If the top begins browning too quickly, loosely cover the loaf with aluminum foil during the final 10–15 minutes of baking.
For the most reliable result, use an instant-read thermometer. The center of the finished bread should reach approximately 200–205°F (93–96°C).
This helps ensure that the center is fully baked rather than gummy.
9. Cool Completely
Remove the loaf from the oven and let it cool in the pan for approximately 10 minutes.
Carefully remove the bread from the pan and place it on a wire cooling rack.
Allow it to cool completely for at least 1½–2 hours before slicing.
Although it can be tempting to cut into warm homemade bread immediately, gluten-free bread needs time to finish setting. Cutting it too early can make the center appear gummy or cause the slices to fall apart.
10. Slice and Serve
Once completely cool, use a sharp serrated knife to slice the bread.
For sandwiches, slices approximately ½ inch thick work well. Serve with butter, cheese, eggs, peanut butter, jam, or your favorite sandwich fillings.
The bread can also be toasted, making it particularly useful for breakfast.
Tips for the Softest Gluten-Free Bread
Use the correct flour blend. Gluten-free flour blends vary significantly. A blend containing rice flour, tapioca or potato starch, and a suitable binder generally works well.
Don’t add extra flour. Gluten-free dough is supposed to be sticky. Adding additional flour can make the finished loaf dry and dense.
Measure by weight when possible. Gluten-free flours can vary considerably when measured by volume. Using a kitchen scale gives more consistent results.
Don’t overproof. Allow the dough to become nicely puffy, but don’t wait until it has dramatically risen above the pan.
Let it cool. Complete cooling is one of the most important steps for achieving a good gluten-free crumb.
Dairy-Free Variation
To make this bread dairy-free, replace the milk with an unsweetened plant-based milk such as almond, soy, or oat milk. Use vegetable oil instead of butter.
The remaining ingredients can stay the same.
Storage
Once completely cool, wrap the bread tightly in plastic wrap or place it in an airtight container.
It can be kept at room temperature for approximately 2 days. For longer storage, slice the loaf and freeze the slices in a freezer-safe bag or container.
Frozen slices can be placed directly into a toaster, making it convenient to enjoy fresh-tasting gluten-free bread whenever you need it.
Final Result
This soft and fluffy gluten-free bread has a tender interior, lightly golden crust, and enough structure for sandwiches without becoming excessively dense or crumbly. The tapioca starch helps create a pleasant chew, while eggs and oil contribute moisture and tenderness.
Once you become comfortable with the sticky consistency of gluten-free dough and resist the temptation to add extra flour, homemade gluten-free bread becomes much easier to make. With proper proofing, baking, and cooling, you can have a delicious loaf that is soft enough for everyday sandwiches and sturdy enough for toast.

