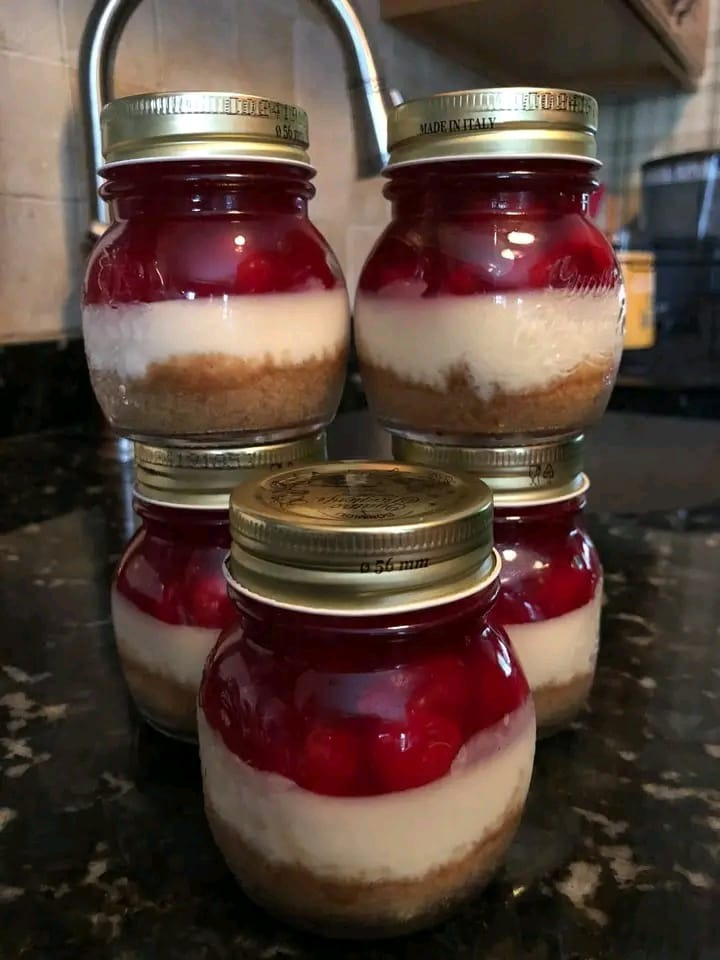
Creamy mini cheesecakes are the perfect dessert when you want something rich, smooth, and indulgent without making an entire full-size cheesecake. These individual cheesecakes have a buttery biscuit crust, a silky cream cheese filling, and a lightly golden top. They are easy to portion, simple to decorate, and ideal for birthdays, tea parties, dinner gatherings, or whenever you are craving cheesecake.
The best part is that mini cheesecakes require less baking time than a traditional cheesecake and can be customized with fresh fruit, chocolate, caramel, whipped cream, or your favorite sauce.
Ingredients
For the crust
- 1 ½ cups digestive biscuits or graham crackers, finely crushed
- 5 tablespoons unsalted butter, melted
- 2 tablespoons granulated sugar
- ¼ teaspoon salt
For the creamy cheesecake filling
- 16 ounces (450 g) full-fat cream cheese, softened to room temperature
- ½ cup granulated sugar
- ½ cup sour cream
- 2 large eggs, room temperature
- 1 teaspoon pure vanilla extract
- 1 tablespoon all-purpose flour or cornstarch
- 2 tablespoons heavy cream or whipping cream
- 1 tablespoon fresh lemon juice
- Pinch of salt
Optional toppings
- Fresh strawberries, blueberries, or raspberries
- Strawberry or raspberry sauce
- Chocolate ganache
- Caramel sauce
- Whipped cream
- Lemon zest
- Crushed biscuits
- Powdered sugar
- Chopped nuts
Equipment
You will need:
- A 12-cup muffin pan
- 12 paper or silicone cupcake liners
- Mixing bowls
- Electric hand mixer or stand mixer
- Measuring cups and spoons
- Food processor or rolling pin for crushing biscuits
- Rubber spatula
- Wire cooling rack
Instructions
1. Prepare the oven and muffin pan
Preheat your oven to 325°F (165°C). Line a 12-cup muffin pan with paper liners. Using liners makes it much easier to remove the mini cheesecakes after they have chilled.
If you are using a dark-colored muffin pan, you may want to reduce the oven temperature slightly or keep a close eye on the cheesecakes because dark pans can brown the edges more quickly.
2. Make the biscuit crust
Place the digestive biscuits or graham crackers in a food processor and process them until they resemble fine crumbs. If you do not have a food processor, put the biscuits into a sealed bag and crush them with a rolling pin.
Transfer the crumbs to a bowl and add the melted butter, sugar, and salt. Stir thoroughly until all the crumbs are evenly coated with butter. The mixture should resemble damp sand and hold together when pressed.
Divide the crust mixture evenly among the 12 cupcake liners. A little over 1 tablespoon per cup is usually enough.
Press the crumbs firmly into the bottom of each liner using the back of a spoon, the bottom of a small glass, or your fingers.
Bake the crusts for approximately 5–7 minutes. They do not need to become deeply brown. You simply want the butter and crumbs to set.
Remove the pan from the oven and let the crusts cool slightly while you prepare the filling.
3. Prepare the cream cheese
Place the softened cream cheese in a large mixing bowl. Beat it on low to medium speed until smooth and creamy.
This step is important because cream cheese that is still cold can leave lumps in the finished filling. For the smoothest texture, allow the cream cheese to sit at room temperature for about 30–60 minutes before mixing.
Avoid beating the cream cheese excessively. Mini cheesecakes are best when the filling is smooth but not filled with lots of air.
4. Add the sugar
Gradually add the granulated sugar and mix until it is incorporated.
Scrape down the sides and bottom of the bowl with a rubber spatula. This ensures that there are no unmixed pockets of cream cheese.
5. Add sour cream and flavorings
Add the sour cream, vanilla extract, lemon juice, salt, flour or cornstarch, and heavy cream.
Mix on low speed just until everything is combined.
The sour cream gives the cheesecakes a wonderfully creamy texture and adds a subtle tang that balances the sweetness. Lemon juice also helps brighten the flavor without making the cheesecakes taste strongly of lemon.
6. Add the eggs
Add the eggs one at a time. Mix on low speed after each addition, stopping as soon as the egg disappears into the batter.
Do not overmix at this stage. Excessive mixing can incorporate too much air, which may cause the cheesecakes to puff dramatically in the oven and then sink as they cool.
The finished batter should be thick, smooth, and creamy.
7. Fill the muffin cups
Spoon the cheesecake mixture over the cooled crusts, dividing it evenly among all 12 cups.
Fill each liner approximately three-quarters full. You should have enough batter to make 12 generous mini cheesecakes.
Gently tap the muffin pan against the countertop once or twice to release any large air bubbles.
8. Bake the mini cheesecakes
Place the muffin pan in the preheated oven and bake for approximately 18–23 minutes.
The cheesecakes are done when the edges look set but the centers still have a slight wobble when you gently move the pan.
Do not wait until the centers look completely firm. Cheesecake continues to set as it cools, and overbaking can result in a dry or cracked filling.
The tops should remain relatively pale, although a very light golden color around the edges is perfectly fine.
9. Cool gradually
Remove the pan from the oven and place it on a wire cooling rack.
Allow the cheesecakes to cool in the pan for about 30 minutes. Then transfer the pan to the refrigerator.
Chill the mini cheesecakes for at least 3–4 hours, although overnight chilling will give you an even firmer texture and deeper flavor.
Do not rush this step. Proper chilling is one of the secrets to achieving that classic creamy cheesecake consistency.
10. Add your favorite toppings
Once the cheesecakes are completely chilled, carefully remove the paper liners.
You can serve them plain, but toppings make these little desserts especially attractive.
For a classic fruit topping, add a spoonful of strawberry or raspberry sauce and place a few fresh berries on top.
For a chocolate version, drizzle each cheesecake with melted chocolate or chocolate ganache. A small swirl of whipped cream makes the presentation even more impressive.
For caramel lovers, drizzle the cheesecakes with caramel sauce and sprinkle a few chopped toasted nuts over the top.
Tips for the Creamiest Mini Cheesecakes
Use full-fat cream cheese. Reduced-fat cream cheese contains more moisture and may produce a softer filling. Full-fat cream cheese provides the richest texture and flavor.
Bring ingredients to room temperature. Softened cream cheese and room-temperature eggs combine much more smoothly than cold ingredients.
Do not overmix. Mixing introduces air into the batter. Too much air can cause the cheesecakes to rise and fall dramatically.
Do not overbake. A slight jiggle in the center is a good thing. The filling will firm up as it cools.
Chill thoroughly. Warm cheesecake is much softer than properly refrigerated cheesecake. Give the mini cheesecakes several hours to set.
Press the crust firmly. A compact crust is less likely to crumble when you remove the cheesecakes from their liners.
Flavor Variations
One of the reasons this recipe is so versatile is that the basic cheesecake filling can be transformed into many different flavors.
Strawberry Mini Cheesecakes
Top the chilled cheesecakes with strawberry sauce and thinly sliced fresh strawberries. For an extra-special presentation, pipe a small swirl of whipped cream on each cheesecake.
Chocolate Mini Cheesecakes
Replace about 2 tablespoons of the biscuit crumbs with cocoa powder for a chocolate crust. You can also add ½ cup of melted and slightly cooled chocolate to the cheesecake batter.
Lemon Mini Cheesecakes
Add an extra teaspoon of finely grated lemon zest to the filling. Top each cheesecake with a little lemon curd and a small curl of lemon zest.
Blueberry Mini Cheesecakes
Add blueberry sauce to the top and finish with fresh blueberries. A little lemon zest pairs beautifully with blueberries.
Caramel Cheesecakes
Drizzle the finished cheesecakes with salted caramel sauce. Add a sprinkle of flaky sea salt and chopped pecans for a delicious sweet-and-salty combination.
How to Store Mini Cheesecakes
Store the cheesecakes in an airtight container in the refrigerator. They should keep well for approximately 4–5 days when properly refrigerated.
If you are preparing them for a party, making them the day before is an excellent option. In fact, the flavor and texture can improve after several hours in the refrigerator.
You can also freeze mini cheesecakes. Place the completely chilled cheesecakes on a tray and freeze them until firm. Then wrap them individually in plastic wrap and place them in a freezer-safe container or bag.
They can generally be frozen for up to 2–3 months. Thaw them overnight in the refrigerator before serving. Add fresh toppings after thawing rather than before freezing for the best appearance.
Frequently Asked Questions
Can I make these without a muffin liner?
Yes, but liners make the process considerably easier. Without liners, you will need to carefully grease the muffin pan and may have difficulty removing the cheesecakes without damaging the crust.
Why did my mini cheesecakes crack?
Cracks can happen when cheesecakes are overbaked, mixed excessively, or cooled too quickly. A cracked cheesecake is still delicious, and toppings such as fruit, chocolate, or whipped cream can easily hide small cracks.
Can I use a different type of biscuit?
Absolutely. Digestive biscuits and graham crackers are excellent choices, but you can also use vanilla wafers, chocolate cookies, shortbread biscuits, or other crisp cookies.
Can I make them ahead of time?
Yes. Mini cheesecakes are actually an excellent make-ahead dessert. Prepare them the day before serving and keep them refrigerated. Add toppings shortly before serving.
Serving Suggestions
For an elegant dessert table, arrange the mini cheesecakes on a large serving platter and decorate each one differently. Some can have berries, some can have chocolate drizzle, and others can have caramel and nuts.
You can also serve them individually with a small spoonful of berry sauce on the plate. A few fresh berries and a dusting of powdered sugar will make them look bakery-worthy with very little effort.
These cheesecakes are especially delicious when served cold, but letting them sit at room temperature for about 10–15 minutes before eating can make the filling even softer and creamier.
Final Thoughts
These creamy mini cheesecakes are an easy and impressive dessert that combines a buttery biscuit base with a rich, silky cream cheese filling. Because they are baked in individual portions, they are easier to serve than a traditional cheesecake and require much less cutting and presentation work.
The key to success is simple: use softened full-fat cream cheese, mix the batter gently, avoid overbaking, and give the cheesecakes plenty of time to chill. Once you have mastered the basic recipe, you can experiment with berries, chocolate, caramel, citrus, cookies, or nuts to create your own favorite version.
Whether you are making them for a family gathering, a holiday celebration, afternoon tea, or simply a weekend treat, these creamy mini cheesecakes are guaranteed to be a crowd-pleaser. The individual size also makes them perfect for portion control—although their rich, creamy texture may make it difficult to stop at just one!

