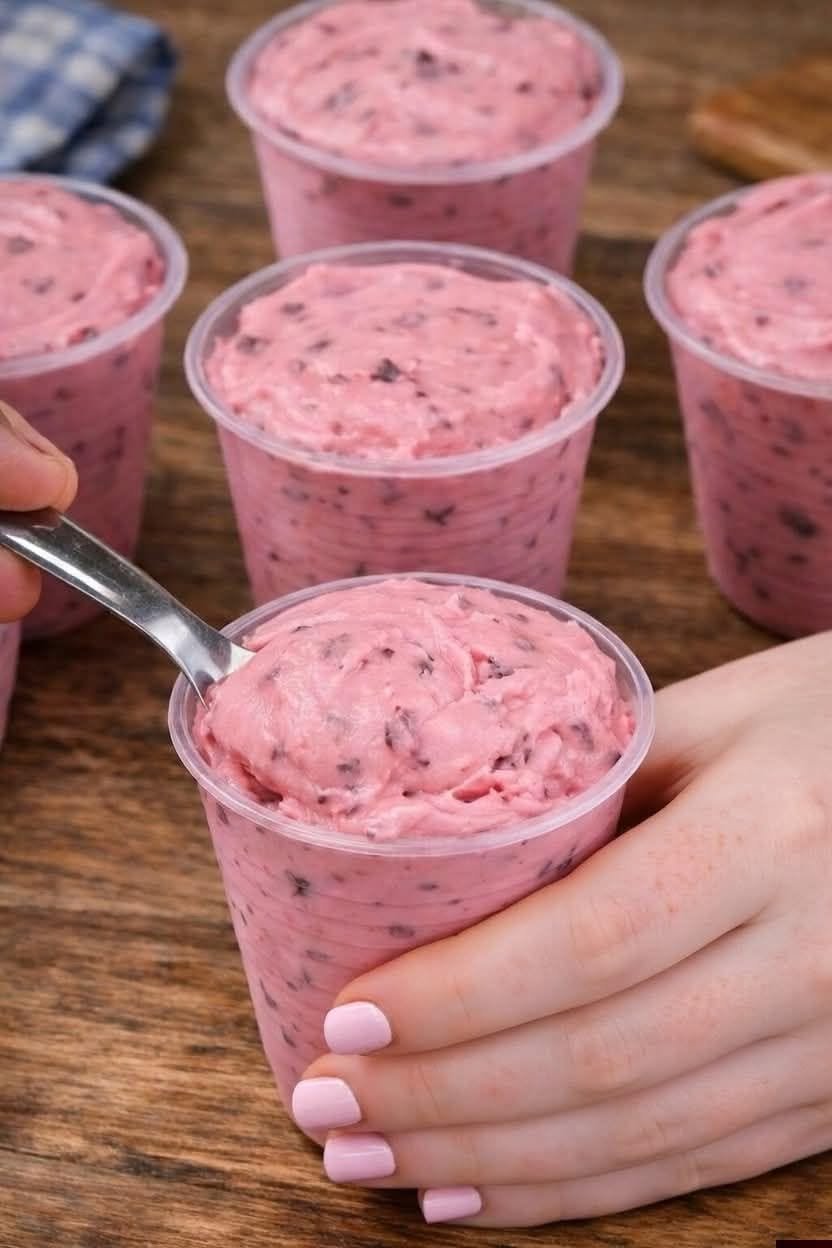
There’s something wonderfully nostalgic about strawberry ice cream. Its creamy texture, sweet berry flavor, and pretty pink color make it a favorite for warm afternoons, family gatherings, and simple after-dinner treats. The only problem is that traditional ice cream can be quite rich, with plenty of added sugar and fat.
This Zero-Point Strawberry Ice Cream offers a lighter alternative that is creamy, refreshing, and packed with fresh strawberry flavor. It is made with simple ingredients and can be prepared without an ice-cream maker. The result is a delicious frozen dessert that feels indulgent without being overly heavy.
The term “zero-point” can mean different things depending on the specific points-based program you follow, so always check the current food-point values for your plan and ingredients. The recipe below focuses on naturally light ingredients and avoids traditional added sugar.
Why You’ll Love This Recipe
This strawberry ice cream is especially appealing because it requires only a handful of ingredients. Fresh strawberries provide natural sweetness, vibrant color, and plenty of fruity flavor, while nonfat Greek yogurt gives the dessert a creamy consistency and adds protein.
Unlike many homemade ice cream recipes, there is no need for heavy cream, egg yolks, or large amounts of sugar. You can also adjust the sweetness according to your personal taste.
The recipe is ideal when you want something cold and refreshing but don’t want a complicated dessert project. It works beautifully as an afternoon snack, a light dessert after dinner, or a healthier treat for the whole family.
Ingredients
- 3 cups fresh strawberries, hulled and chopped
- 1½ cups plain nonfat Greek yogurt
- 2 to 4 tablespoons calorie-free sweetener, adjusted to taste
- 1 teaspoon pure vanilla extract
- 1 tablespoon fresh lemon juice
- Pinch of salt
- 2 to 4 tablespoons unsweetened almond milk or another low-calorie milk, only if needed
Fresh strawberries are best when they are ripe, fragrant, and naturally sweet. If your strawberries are particularly tart, you may want to add a little more sweetener.
Greek yogurt works particularly well because it is thicker than regular yogurt. It helps create a creamy frozen texture while keeping the recipe relatively light.
Preparing the Strawberries
Start by washing the strawberries thoroughly under cool running water. Remove the green tops and cut the berries into smaller pieces.
Place the strawberries in a blender or food processor. Add the lemon juice and vanilla extract. Blend until the mixture becomes smooth.
If you prefer strawberry ice cream with small pieces of fruit throughout, don’t blend the berries completely. Instead, pulse them until they are mostly smooth but still contain a few small pieces.
Taste the strawberry mixture. If the berries are naturally sweet, you may need very little sweetener. If they are tart, gradually add your chosen calorie-free sweetener until the flavor is balanced.
Remember that freezing dulls sweetness slightly, so the mixture should taste a little sweeter than you want the finished ice cream to taste.
Combining the Ingredients
Add the nonfat Greek yogurt to the strawberry mixture. Blend again until everything is completely combined and creamy.
Add a small pinch of salt. Although salt may seem unusual in a dessert recipe, a tiny amount can enhance the natural sweetness and strawberry flavor.
Taste the mixture once more. Adjust the sweetener, vanilla, or lemon juice if necessary.
The lemon juice is particularly helpful because it brightens the strawberries and prevents the flavor from tasting flat. However, don’t add too much, as excessive acidity can overpower the delicate berry flavor.
If the mixture is extremely thick, add one tablespoon of unsweetened almond milk at a time and blend until smooth. You want a thick, spoon able mixture rather than a thin liquid.
Freezing Without an Ice-Cream Maker
Pour the strawberry mixture into a shallow freezer-safe container. A shallow container is preferable because the mixture will freeze more evenly and quickly.
Cover the container tightly with a lid or plastic wrap.
Place it in the freezer for approximately 30 to 45 minutes. Remove the container and stir the mixture thoroughly, scraping the frozen edges toward the center.
Return it to the freezer and repeat the stirring process every 30 to 45 minutes for the next two to three hours.
This step helps break up ice crystals and produces a smoother homemade ice cream. If you simply freeze the mixture without stirring, it can become harder and icier.
Once the ice cream is mostly frozen but still easy to stir, smooth the surface, cover it, and allow it to freeze until firm.
Using an Ice-Cream Maker
If you have an ice-cream maker, the process is even easier.
Chill the strawberry-yogurt mixture in the refrigerator for at least 30 minutes. Pour it into your ice-cream maker and churn according to the manufacturer’s instructions.
Most machines will produce a soft-serve consistency after churning. You can serve it immediately for a soft dessert or transfer it to a freezer-safe container and freeze it for one to two hours for a firmer texture.
Serving the Ice Cream
Homemade frozen yogurt-style ice cream is often firm straight from the freezer. For the best texture, remove it from the freezer and let it sit at room temperature for approximately 5 to 10 minutes before scooping.
Use a warm ice-cream scoop to create neat scoops.
For an attractive presentation, serve the strawberry ice cream in small bowls and top it with a few sliced fresh strawberries. You can also add fresh mint leaves for color.
If you want to keep the dessert especially light, simply serve it on its own. The fresh strawberry flavor is delicious enough without elaborate toppings.
Helpful Tips for the Best Results
Choose ripe strawberries whenever possible. Because this recipe contains relatively few ingredients, the quality of the berries makes a noticeable difference.
Don’t skip the lemon juice. A small amount helps bring out the berry flavor and adds freshness.
Be careful with the sweetener. Different calorie-free sweeteners vary considerably in sweetness, so begin with a small amount and increase gradually.
For a creamier result, use thick Greek yogurt rather than regular yogurt.
If the finished ice cream becomes very hard, allow it to sit on the counter for several minutes before scooping. Avoid repeatedly thawing and refreezing the entire container, as this can encourage larger ice crystals to form.
For convenient portions, you can freeze the mixture in small silicone molds or individual freezer-safe containers. This makes it easy to take out only the amount you need.
Variations
Although strawberry is the star of this recipe, you can experiment with different flavors.
For a strawberry-lemon version, increase the lemon zest while keeping the lemon juice moderate.
For a strawberry-vanilla dessert, add a little extra vanilla extract.
You can also blend in a small amount of other berries, such as raspberries or blueberries, for a mixed-berry frozen dessert.
Another option is to reserve a few strawberries, chop them finely, and stir them into the mixture just before freezing. This creates little bursts of fresh fruit throughout the ice cream.
Storage
Keep the ice cream in a tightly sealed freezer-safe container. For the best texture and flavor, enjoy it within approximately one to two weeks.
Place a piece of parchment or freezer paper directly against the surface before sealing the container. This can help reduce exposure to air and limit the formation of ice crystals.
Always use clean utensils when serving so that the ice cream stays fresh.
Final Thoughts
This Zero-Point Strawberry Ice Cream is proof that a lighter dessert doesn’t have to feel boring or restrictive. With fresh strawberries, creamy nonfat Greek yogurt, vanilla, lemon, and a suitable zero-calorie sweetener, you can create a refreshing frozen treat with plenty of natural fruit flavor.
The recipe is flexible, simple, and easy to customize. Whether you make it with an ice-cream maker or use the freezer-and-stir method, the most important step is choosing ripe, flavorful strawberries and tasting the mixture before freezing.
Serve it after dinner, enjoy it on a warm afternoon, or keep a small batch in the freezer whenever you want something sweet and refreshing. If you’re following a specific points-based program, verify the ingredients and serving size in that program’s current calculator, since point values can change by plan and product.

