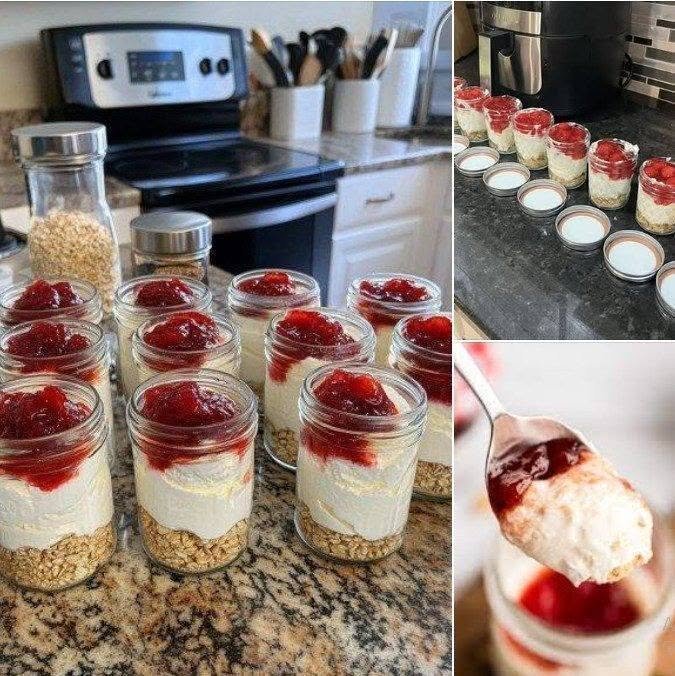
If you love creamy cheesecake but do not want to turn on the oven, these Easy No-Bake Cheesecake Bars are the perfect dessert. They have a buttery, crunchy biscuit crust and a smooth, creamy cheesecake filling with just the right amount of sweetness. The best part is that there is no baking involved.
These cheesecake bars are simple enough for beginners and elegant enough to serve at birthdays, family gatherings, holidays, potlucks, or afternoon tea. You can prepare them ahead of time and keep them chilled until you are ready to serve.
The recipe uses basic ingredients and can easily be customized with fresh fruit, chocolate, caramel, or your favorite topping.
Ingredients
For the Crust
- 2 cups graham cracker crumbs or crushed digestive biscuits
- 6 tablespoons unsalted butter, melted
- 2 tablespoons granulated sugar
- 1 teaspoon vanilla extract
- Pinch of salt
For the Cheesecake Filling
- 16 ounces (450 g) full-fat cream cheese, softened
- ½ cup powdered sugar
- 1 teaspoon vanilla extract
- 1 tablespoon fresh lemon juice
- 1 cup heavy whipping cream, cold
- ¼ cup powdered sugar for the whipped cream
- 1 teaspoon lemon zest, optional
For the Topping
- 1 cup fresh strawberries, blueberries, raspberries, or mixed berries
- 2 tablespoons strawberry or raspberry sauce, optional
- Powdered sugar, optional
- Fresh mint leaves, optional
Equipment
You will need:
- 8-inch or 9-inch square baking pan
- Parchment paper
- Mixing bowls
- Electric hand mixer or stand mixer
- Spatula
- Measuring cups and spoons
- Food processor or rolling pin for crushing biscuits
Step 1: Prepare the Pan
Begin by lining an 8-inch or 9-inch square baking pan with parchment paper.
Leave some parchment paper hanging over two sides of the pan. This will make it much easier to lift the cheesecake out once it has chilled.
For especially easy removal, you can lightly grease the pan before adding the parchment paper.
Step 2: Make the Biscuit Crust
Place the graham crackers or digestive biscuits in a food processor and pulse until they become fine crumbs.
If you do not have a food processor, place the biscuits in a strong resealable bag and crush them with a rolling pin.
Measure out 2 cups of crumbs and place them in a bowl.
Add the melted butter, granulated sugar, vanilla extract, and a small pinch of salt. Stir thoroughly until all the crumbs are evenly coated with butter.
The mixture should resemble damp sand and hold together when pressed.
Step 3: Press the Crust Into the Pan
Transfer the crumb mixture to the prepared pan.
Use the bottom of a glass, measuring cup, or flat spatula to press the crumbs firmly and evenly across the bottom of the pan.
Pressing the crust firmly is important because it helps prevent the cheesecake bars from falling apart when sliced.
Place the crust in the refrigerator while you prepare the filling.
Chill it for at least 15–20 minutes.
Step 4: Prepare the Cream Cheese
Place the softened cream cheese in a large mixing bowl.
Add ½ cup powdered sugar, vanilla extract, fresh lemon juice, and optional lemon zest.
Beat the mixture with an electric mixer on medium speed until it becomes completely smooth and creamy.
Make sure the cream cheese is softened before mixing. Cold cream cheese can leave small lumps in the filling.
Scrape down the sides of the bowl occasionally to ensure everything is evenly combined.
Step 5: Whip the Cream
In a separate clean bowl, pour in the cold heavy whipping cream.
Add ¼ cup powdered sugar.
Beat the cream with an electric mixer until stiff peaks form.
This means that when you lift the beaters, the whipped cream should hold its shape rather than immediately falling back into the bowl.
Be careful not to overbeat the cream because it can become grainy and eventually turn into butter.
Step 6: Combine the Filling
Add approximately one-third of the whipped cream to the cream cheese mixture.
Gently fold it in using a spatula.
Continue adding the remaining whipped cream in two additions.
Fold gently rather than stirring aggressively. This helps maintain the light, fluffy texture of the filling.
When finished, the cheesecake mixture should be smooth, creamy, and thick enough to spread.
Step 7: Add the Filling to the Crust
Remove the chilled crust from the refrigerator.
Spoon the cheesecake filling over the crust.
Use a spatula to spread the filling evenly from edge to edge.
Smooth the surface as much as possible.
If you want a decorative finish, gently swirl the top with the back of a spoon or spatula.
Step 8: Chill the Cheesecake
Cover the pan with plastic wrap or aluminum foil.
Place it in the refrigerator for at least 6 hours, although chilling overnight gives the best results.
Unlike baked cheesecake, no-bake cheesecake depends on chilling to develop a firm texture. Do not rush this step.
For an even firmer cheesecake, you can place it in the refrigerator overnight.
Step 9: Add the Toppings
Once the cheesecake is completely set, remove it from the refrigerator.
Use the parchment paper to carefully lift the cheesecake from the pan.
Place it on a cutting board.
Top it with fresh strawberries, blueberries, raspberries, or a mixture of berries.
You can also drizzle the top with strawberry sauce, raspberry sauce, chocolate sauce, or caramel.
For an elegant presentation, add a light dusting of powdered sugar and a few fresh mint leaves.
Step 10: Slice and Serve
For clean cheesecake slices, use a sharp knife.
Dip the knife in warm water, wipe it dry, and then cut the cheesecake.
Repeat this process between slices for neat, professional-looking pieces.
Depending on the size of your cuts, this recipe can make approximately 12–16 cheesecake bars.
Serve chilled.
Delicious Variations
One of the best things about no-bake cheesecake bars is how easily you can change the flavor.
Strawberry Cheesecake Bars
Add sliced fresh strawberries to the top and drizzle with strawberry sauce.
Chocolate Cheesecake Bars
Mix ¼ cup unsweetened cocoa powder into the cream cheese mixture. You can also add melted and cooled chocolate for a richer flavor.
Top with chocolate shavings.
Lemon Cheesecake Bars
Increase the lemon zest and lemon juice slightly for a refreshing citrus flavor. Add thin lemon slices as decoration.
Blueberry Cheesecake Bars
Top the finished cheesecake with fresh blueberries and homemade blueberry sauce.
Caramel Cheesecake Bars
Drizzle caramel sauce over the chilled cheesecake and sprinkle the top with chopped toasted nuts.
Tips for Perfect No-Bake Cheesecake Bars
Use full-fat cream cheese for the best texture. Reduced-fat cream cheese may produce a softer filling.
Make sure the cream cheese is softened before mixing. This helps create a smooth, lump-free filling.
Keep the whipping cream cold. Cold cream whips more easily and creates a stronger filling.
Do not skip the chilling time. The cheesecake needs several hours in the refrigerator to become firm enough to slice.
Press the crust firmly into the pan. A loose crust can crumble when you lift or cut the bars.
For the cleanest presentation, chill the cheesecake overnight before slicing.
How to Store
Store leftover cheesecake bars in an airtight container or cover the pan tightly with plastic wrap.
Keep them refrigerated for up to 4–5 days.
Because the filling contains cream cheese and whipped cream, the dessert should remain refrigerated and should not be left at room temperature for an extended period.
You can also freeze the cheesecake bars. For best results, freeze them without fresh fruit toppings. Once the cheesecake is firm, cut it into individual bars and wrap each piece tightly.
Place the wrapped bars in a freezer-safe container and freeze for up to approximately 1 month.
Thaw the bars in the refrigerator before serving.
Frequently Asked Questions
Can I make these bars without gelatin?
Yes. This recipe does not require gelatin. The cream cheese, whipped cream, and refrigeration provide the structure.
Why is my cheesecake too soft?
The cheesecake may need more chilling time. Make sure it has refrigerated for at least 6 hours, preferably overnight. Also check that the whipping cream was beaten to stiff peaks.
Can I use digestive biscuits instead of graham crackers?
Absolutely. Digestive biscuits make an excellent substitute and provide a slightly richer crust.
Can I prepare the cheesecake the day before?
Yes. In fact, preparing it the day before is recommended because overnight refrigeration allows the filling to become firm and the flavors to develop.
Final Thoughts
These No-Bake Cheesecake Bars are proof that you do not need an oven to make an impressive dessert. The buttery biscuit crust, creamy vanilla cheesecake filling, and fresh fruit topping create a delicious combination of textures and flavors.
The recipe is easy to prepare, requires simple ingredients, and can be customized for almost any occasion. Whether you choose fresh berries, chocolate, lemon, caramel, or another favorite topping, these cheesecake bars are sure to be a crowd-pleaser.
For the best results, take your time preparing each layer and allow the cheesecake to chill completely before slicing. Once chilled, cut it into neat bars, add your favorite toppings, and enjoy a creamy homemade dessert straight from the refrigerator.

