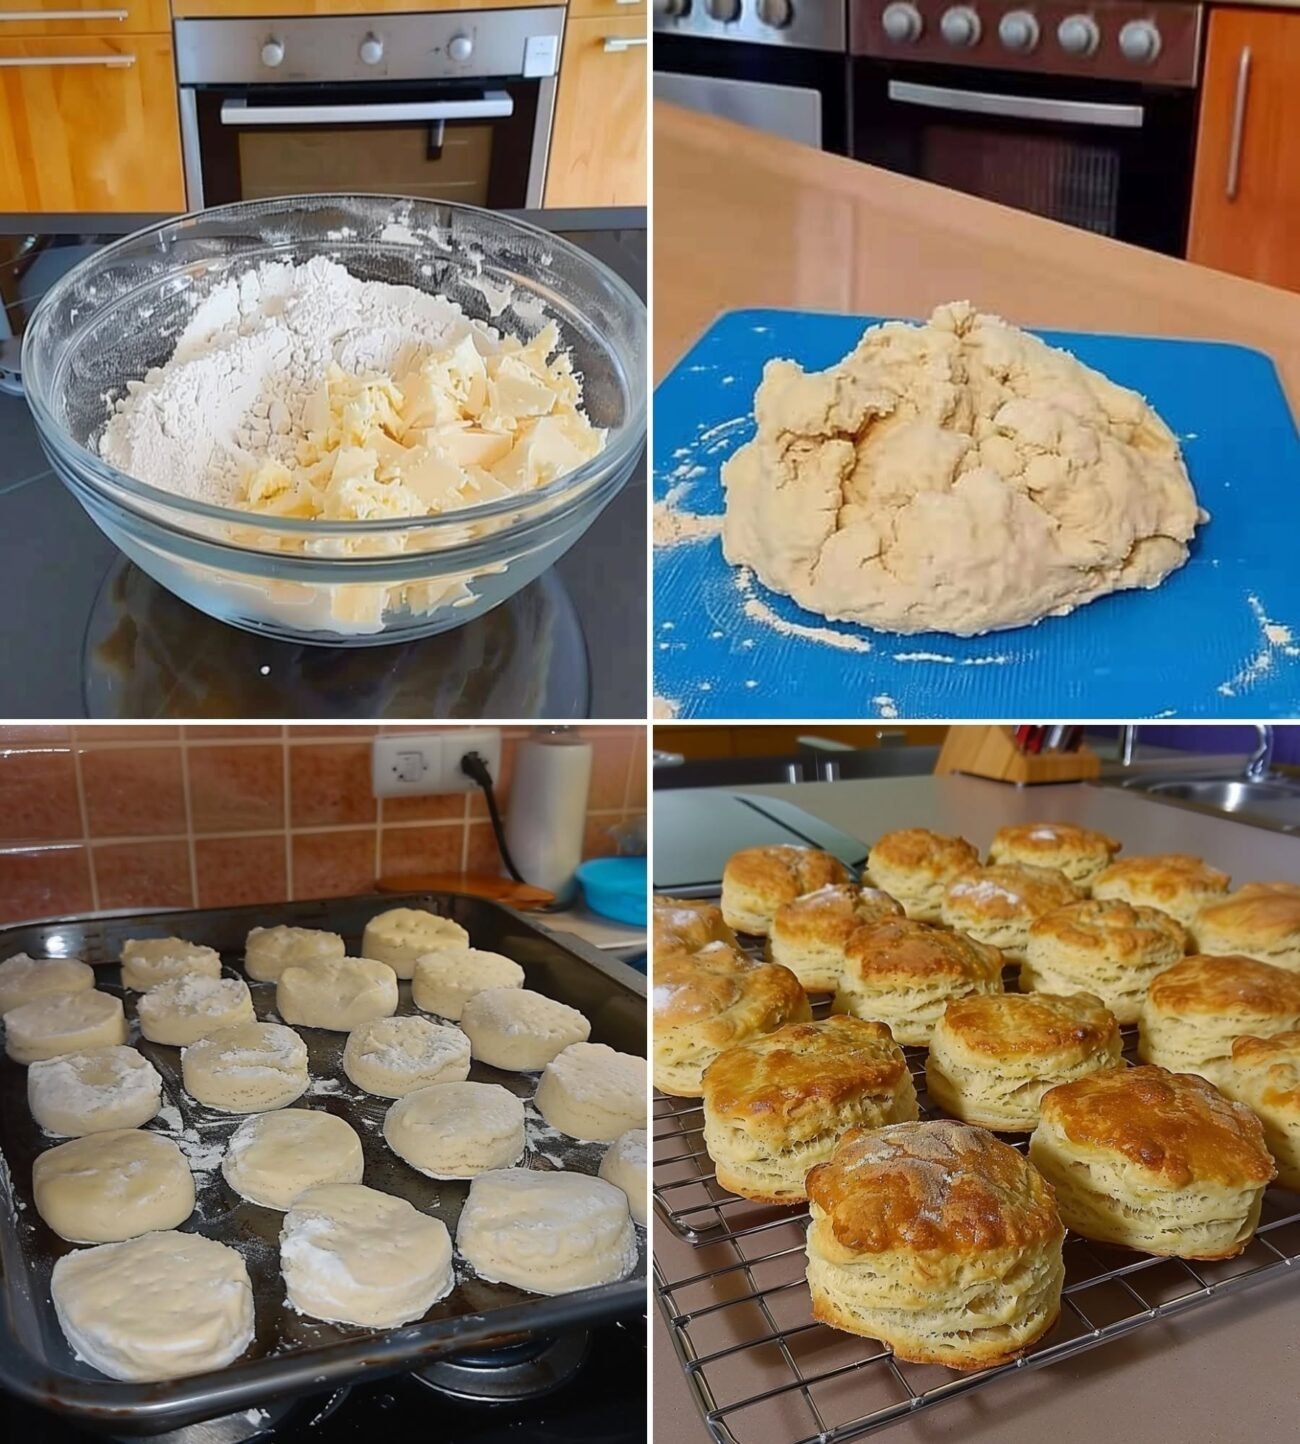
These gluten-free buttermilk biscuits are tender, buttery, flaky, and wonderfully light. They are an excellent option for anyone avoiding gluten but still craving the comforting texture of a classic Southern-style biscuit. The secret is using a well-balanced gluten-free flour blend, plenty of cold butter, and tangy buttermilk.
Unlike some gluten-free baked goods that can turn dry or crumbly, these biscuits have a soft center and lightly crisp, golden edges. They are delicious served warm with butter, honey, jam, gravy, or alongside breakfast and dinner.
Ingredients
For about 8–10 biscuits, you will need:
- 2 cups (about 240 g) gluten-free all-purpose flour blend
- 1 tablespoon baking powder
- 1/2 teaspoon baking soda
- 1 teaspoon salt
- 1 tablespoon granulated sugar
- 1/2 teaspoon xanthan gum, only if your flour blend does not already contain it
- 6 tablespoons (85 g) cold unsalted butter
- 3/4 cup (180 ml) cold buttermilk, plus 1–2 tablespoons if needed
- 1 tablespoon melted butter, for brushing the tops
Choosing the Gluten-Free Flour
The flour blend makes a significant difference in the finished biscuits. Use a gluten-free all-purpose baking blend designed to replace wheat flour cup-for-cup. Many commercial blends contain a combination of rice flour, tapioca starch, potato starch, or other gluten-free ingredients.
Check the ingredient label before adding xanthan gum. If the blend already contains xanthan gum or another gluten-replacing binder, you generally do not need to add extra. Too much xanthan gum can make biscuits gummy rather than tender.
If you need the biscuits to be suitable for someone with celiac disease, make sure every ingredient and piece of equipment is appropriately gluten-free and protected from cross-contact.
Why Buttermilk Works So Well
Buttermilk gives these biscuits their characteristic tang and tender texture. Its acidity also reacts with the baking soda, helping create carbon dioxide bubbles that contribute to a lighter biscuit.
Cold buttermilk is particularly useful because the goal is to keep the butter cold until the biscuits go into the oven. When the cold butter melts during baking, it creates pockets of steam and fat that help produce a flaky texture.
If your buttermilk is very thick, you may need a little extra liquid. Gluten-free flour blends can vary considerably in how much moisture they absorb, so don’t add all the liquid at once if your dough already looks sufficiently hydrated.
Step-by-Step Instructions
1. Preheat the Oven
Preheat your oven to 425°F (220°C).
Place an oven rack in the center position. A properly preheated oven is important because biscuits need an immediate burst of heat to rise properly.
For especially crisp bottoms, you can preheat a cast-iron skillet or baking sheet while preparing the dough. Be careful when handling a hot pan.
2. Combine the Dry Ingredients
In a large mixing bowl, whisk together:
- Gluten-free flour
- Baking powder
- Baking soda
- Salt
- Sugar
- Xanthan gum, if required
Whisk thoroughly so the leavening agents and salt are evenly distributed throughout the flour.
This step matters more with biscuits than you might expect. If baking powder or baking soda isn’t evenly distributed, some biscuits may rise more than others.
3. Cut in the Cold Butter
Cut the cold butter into small cubes.
Add the butter to the flour mixture. Using a pastry cutter, fork, or your fingertips, work the butter into the flour until the mixture resembles coarse crumbs.
Don’t try to completely eliminate every piece of butter. A few small pieces about the size of peas are desirable.
Those little pieces of butter are one of the keys to flaky biscuits.
If the butter starts becoming soft or greasy while you’re working, place the bowl in the refrigerator for about 10 minutes before continuing.
4. Add the Buttermilk
Pour about 3/4 cup of cold buttermilk into the flour and butter mixture.
Use a fork or wooden spoon to gently stir until the dough begins to come together.
The dough should look moist and somewhat shaggy. Gluten-free biscuit dough can behave differently from traditional wheat-based dough, so don’t expect it to become elastic.
If there are many dry crumbs remaining at the bottom of the bowl, add another tablespoon of buttermilk at a time until the dough holds together.
Avoid adding too much liquid. The goal is a soft dough that can be shaped, not a batter.
5. Let the Dough Rest
Allow the dough to rest for approximately 5–10 minutes.
This short resting period gives the gluten-free flour time to absorb moisture. It can make the dough easier to handle and can improve the final texture.
Unlike wheat dough, you don’t need to knead aggressively. In fact, excessive handling can make the biscuits dense.
6. Shape the Biscuits
Lightly dust your work surface with gluten-free flour, or place a sheet of parchment paper on the counter.
Transfer the dough onto the surface.
Gently pat the dough into a rectangle or round approximately 3/4 to 1 inch thick.
For taller biscuits, aim toward the thicker end of that range.
Use a round biscuit cutter approximately 2 to 2 1/2 inches in diameter to cut the biscuits.
Press the cutter straight down and lift it straight back up. Try not to twist the cutter, because twisting can compress the edges and interfere with how the biscuits rise.
Gather the scraps and gently press them together to cut additional biscuits. Try to avoid repeatedly working the scraps, since this can make later biscuits less tender.
7. Arrange the Biscuits
Place the biscuits on a parchment-lined baking sheet.
For biscuits with crispier edges, leave about an inch of space between them.
For softer sides and a taller rise, arrange the biscuits so they are touching each other slightly.
If your kitchen is warm and the butter has softened noticeably, refrigerate the shaped biscuits for 10–15 minutes before baking.
8. Brush With Butter
Melt about 1 tablespoon of butter and lightly brush it over the tops of the biscuits.
This gives them a beautiful golden finish and adds extra buttery flavor.
You can also brush them with a little buttermilk instead if you prefer a slightly less rich topping.
9. Bake
Place the biscuits in the preheated oven.
Bake for approximately 15–20 minutes, or until the tops are golden brown and the biscuits have visibly risen.
The exact baking time will depend on their size, thickness, and your oven.
Start checking around the 15-minute mark.
If the tops are browning too quickly but the centers aren’t finished, loosely cover the biscuits with aluminum foil and continue baking.
10. Cool Briefly and Serve
Remove the biscuits from the oven and allow them to cool for about 5 minutes.
They are best served warm.
For an extra buttery finish, brush the hot biscuits with another small amount of melted butter immediately after removing them from the oven.
Tips for Light and Flaky Gluten-Free Biscuits
Keep the butter cold
Cold butter is one of the most important elements of flaky biscuits. If your butter becomes completely incorporated into the flour and warm, you may lose some of the flaky layers.
For particularly warm kitchens, you can even chill the cubed butter in the freezer for several minutes before using it.
Don’t overmix
Once the buttermilk is added, mix only until the dough comes together.
With traditional wheat biscuits, overmixing can develop gluten and create toughness. Gluten-free biscuits don’t have gluten to develop, but excessive mixing and handling can still produce a dense or gummy texture.
Don’t make the dough too dry
Gluten-free flour often absorbs liquid differently from wheat flour.
If your dough is falling apart into dry crumbs, it probably needs a little more buttermilk. Add it gradually rather than pouring in a large amount at once.
Use a sharp biscuit cutter
A clean, sharp cutter gives the biscuits a better chance of rising evenly.
Remember: press straight down and lift straight up rather than twisting.
Bake immediately
Once the biscuits are shaped, don’t leave them sitting around for a long time at room temperature. The butter can soften and the chemical leavening can begin reacting with the liquid.
Getting the cold biscuits into the hot oven helps maximize their rise.
Easy Variations
Cheddar Gluten-Free Biscuits
Add 1 cup of shredded sharp cheddar cheese to the dry ingredients before adding the buttermilk.
For extra flavor, add 1/2 teaspoon garlic powder and a tablespoon of chopped fresh parsley.
These are particularly good with soups and chili.
Herb Buttermilk Biscuits
Add 1–2 tablespoons of finely chopped fresh herbs such as:
- Chives
- Parsley
- Rosemary
- Thyme
Fresh herbs add a wonderful savory flavor without changing the basic recipe.
Honey Biscuits
Replace the granulated sugar with 1 tablespoon of honey.
Because honey is liquid, you may need to reduce the buttermilk slightly. These biscuits are excellent with additional honey and butter.
Sweet Breakfast Biscuits
For a sweeter version, increase the sugar to 2–3 tablespoons and add 1 teaspoon of vanilla extract.
You can also fold in dried cranberries, raisins, or blueberries.
Serve them with butter, honey, jam, or fresh fruit.
How to Store Gluten-Free Biscuits
These biscuits are best on the day they are baked, particularly while they’re still warm.
If you have leftovers, let them cool completely before storing them in an airtight container.
They can generally be kept at room temperature for about 1–2 days. For longer storage, refrigerate them or, preferably, freeze them.
To freeze the biscuits, allow them to cool completely, then wrap them individually or place them in a freezer-safe container.
For the best texture, reheat frozen or refrigerated biscuits in a 325–350°F (165–175°C) oven until warmed through.
Microwaving is convenient, but it can make gluten-free baked goods somewhat chewy or rubbery if overheated.
Can You Freeze the Unbaked Biscuits?
Yes. Freezing the shaped dough is an excellent option if you want freshly baked biscuits later.
Place the cut biscuits on a parchment-lined tray and freeze them until firm. Then transfer them to a freezer-safe bag or container.
You can bake them directly from frozen. Add several extra minutes to the normal baking time and watch for a golden-brown top.
This method is especially convenient for weekend breakfasts, holidays, or when you’re preparing food for guests.
Troubleshooting
My biscuits are dry and crumbly.
The dough may not contain enough moisture, or the flour blend may be particularly absorbent. Add buttermilk gradually the next time until the dough is moist enough to hold together.
My biscuits are gummy inside.
They may have been underbaked, or too much liquid or xanthan gum may have been used. Make sure the center is fully baked before removing them from the oven.
My biscuits didn’t rise.
Check that your baking powder and baking soda are fresh. Also make sure your oven was fully preheated and that you didn’t flatten the dough too much.
The biscuits spread instead of rising.
The butter may have become too warm. Chill the shaped biscuits before baking and make sure the oven is thoroughly preheated.
The biscuits are hard.
Try handling the dough more gently and avoid adding excessive flour while shaping. Gluten-free biscuits generally benefit from a softer, slightly moist dough.
Serving Ideas
These gluten-free buttermilk biscuits are versatile enough for breakfast, lunch, and dinner.
Serve them with:
- Butter and honey
- Strawberry or raspberry jam
- Scrambled eggs
- Sausage and gravy
- Fried chicken
- Breakfast sandwiches
- Creamy chicken
- Vegetable soup
- Chili
- Roasted vegetables
- Fresh berries and whipped cream
For a simple breakfast, split a warm biscuit in half, add butter, and drizzle honey over the top. For a savory meal, serve the biscuits alongside soup or use them as the base for a breakfast sandwich.
Final Recipe Summary
For the best results, remember the basic formula: cold butter, cold buttermilk, gentle handling, and a properly preheated oven.
The finished gluten-free buttermilk biscuits should have golden tops, lightly crisp edges, a tender interior, and a rich buttery flavor. Because gluten-free flour blends vary, don’t be afraid to make small adjustments to the amount of buttermilk based on the texture of your dough.
Once you’ve made the recipe a few times, you’ll quickly learn what the dough should look and feel like. From there, you can customize it with cheese, herbs, honey, garlic, or other favorite flavors.
Most importantly, don’t expect gluten-free biscuits to behave exactly like wheat biscuits. Instead, focus on creating a soft, moist dough with visible pieces of cold butter and handle it gently. Those simple techniques will give you flavorful, tender biscuits that are satisfying whether you’re following a gluten-free diet or simply want a delicious homemade breakfast.

